 The tail comes in this surprisingly small box. These 2 tables are my
workspace for the next week.
The tail comes in this surprisingly small box. These 2 tables are my
workspace for the next week.BUILDING THE EMPENNAGE
On this page, the pictures come AFTER the text describing them. It seemed to work better that way as I laid out the page. I hope this isn't confusing.
I planned to get a good jump start on building my plane. First, I took the EAA SportAir Workshop sheet metal intro course in Boston at the end of October. Then, Nov 10 (USMC birthday), I flew to Griffin, GA, south of Atlanta, to assemble my complete tail in 7 days at the Alexander Technical Center.
Sun, Nov 10 = check in and check out the kit
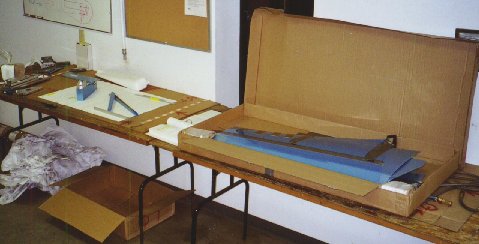
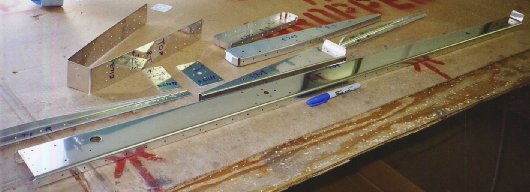
I checked in to my room in the hangar, got something to eat, then began unpacking and inventorying my tail kit. The tail came in two surprisingly small boxes. I was excited to tear into it, after waiting since the end of August to do this. Everything was clearly labeled with a part number to compare against the detailed shipping list. Everything was there. For me and one of the other 3 students there, the vertical stabilizer skin was packed too close to the edge of the box, and the lower aft corner of the skin is bent. So, that will have to be dealt with later. I worked 1900-2200 on unpacking & inventorying.
The tail comes in this surprisingly small box. These 2 tables are my
workspace for the next week.
2200-0200 = After unpacking, I was quite eager to begin the project, so I got out my Van's Section 6 Empennage instructions and began fitting the HS-609PP to the HS-603PP and smoothing the edges and surfaces.
7.0 hours
Mon, Nov 11 = the first "official" day of the course. Met Ed McGowin, the chief instructor.

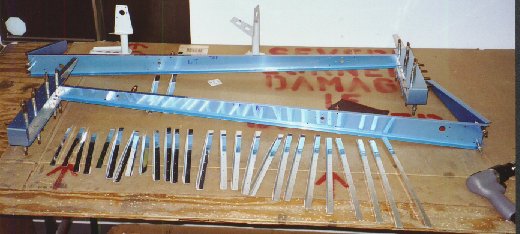
0800-1130 = Debur and polish HS-609PP spar stiffeners. Cleco and match-drill the horizontal stabilizer rear spar assembly. First piece is assembled! Note the handy orange plastic trays we used to hold our clecoes. Silver in one side, copper in the other.
1130-1230 = taper and polish HS-710 and HS-714
1230-1300 = go out to Aircraft Spruce to get some decent drill bits
1300-1730 = Make cuts & bends in HS-702, 710, 714. Cleco and match-drill the H-stab front spar assembly
1730-2030 = cleco and match-drill horizontal stabilizer skins to front & rear spars. First component is assembled!
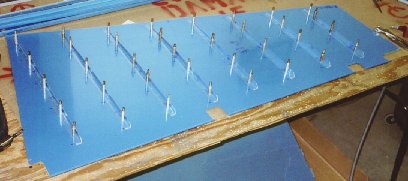
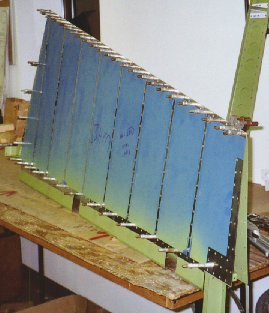
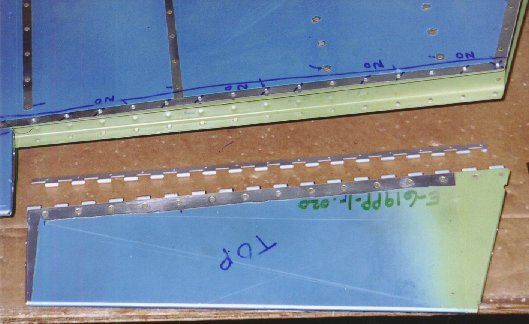
2030-0100 = dismantle and debur horizontal stabilizer parts. Now it's reduced to just a small pile of parts. Note the blue marker and the blue identification & orientation markings on each piece. The blue was recommended, because it shows through the primer paint.
16.5 hours
Tue, Nov 12
0800-1330 = dimple, debur, and polish horizontal stabilizer parts
1330-1400 = debur H-stab skins. They are ready for dimpling on C-frame
1400-1430 = lunch
1430-1700 = start on vertical stabilizer. Bore lightening holes in VS-808PP, debur and polish.
1700-1830 = cleco and match-drill vertical stabilizer frame. Ready to cleco and match-drill V-stab skin at 1830. Have to stop here because my V-stab skin has shipping damage, and I don't want to waste time putting together something I will have to redo later. Ed has contacted Van's about getting a new skin ASAP. He says it will be here Thursday.
1830-1900 = Cleco and match drill VS-803PP, VS-411PP, and VS-412PP. Dismantle V-stab frame and ready to move on to next step
1900-2100 = dinner at Ruby Tuesday's
2100-2330 = fabricate rudder stiffeners
2330-0030 = cleco and match-drill stiffeners to rudder skins
0030-0045 = Peel vinyl off inside of rudder skins & stiffeners for priming.
0045-0130 = disassemble and debur rudder skins & stiffeners.
15.0 hours
Wed, Nov 13
0800-1100 = cleco and match-drill rudder frame and skins.
1100-1130 = dismantle rudder - back to a pile of pieces
1130-1145 = quick lunch
1145-1245 = debur rudder parts
1245-1530 = dimple rudder parts
1530-1630 = break - go look at engine shop and RV-7 project
1630-1800 = final polishing of rudder parts edges & surfaces
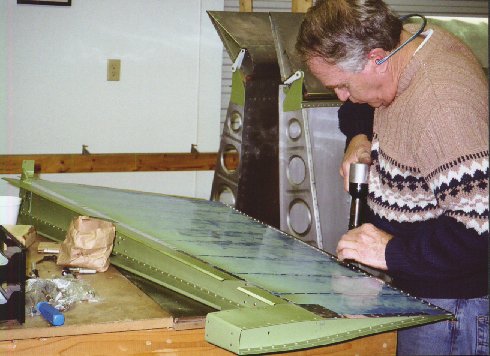
1800-1900 = Countersink both sides of the trailing edge wedge spacer; a rather tricky project. Both sides of the wedge get countersunk. The others did it with a hand tool, but I think I got better results by doing it very carefully with a Magnavon cage and countersink cutter, aided by my magnifying goggles.
1900-2100 = out to dinner at Mexican
2100-2400 = cleco and match-drill both elevators simultaneously. The ATC- recommended method was to do the right first, then the left, but I thought it seemed more efficient to do them both at once.
12.75 hours
Thur, Nov 14
0800-1130 = continue cleco, match-drill, assemble both elevators simultaneously and trim tab. NOTE: fit among E713, E704, E703 is poor on both elevators (outboard ends); not nearly as good as on rest of tail. I had to put a cleco in every hole to hold it together well.
1130-1145 = quick lunch
1145-1300 = work on RT elevator stiffeners. Cleco them to skin and match-drill.
1300-1315 = debur RT elevator skin.
1315-1345 = dimple RT elevator skin
1345-1400 = dismantle RT elevator
1400-1730 = dimple, debur, polish RT elevator parts
1730-1800 = dismantle LT elevator
1800-1900 = cleco and match-drill LT elevator skin stiffeners
1900-1930 = remove LT elevator skin stiffeners
1930-2230 = dimple, debur, polish LT elevator parts
2230-2330 = do countersink holes in E606
2330-0115 = continue debur, dimple, polish LT elevator parts
0115-0130 = dismantle trim tab
17.25 hours
Fri, Nov 15
0800-0830 = dimple LT elevator skin
0830-0900 = countersink E607PP
0900-1030 = debur, dimple polish trim tab parts. Reassemble V-stab frame, and match-drill new skin
1030-1400 = debur, dimple, polish V-stab parts.
1400-1500 = great lunch at McGhin's Southern Pit BBQ. I recommend this place, if you like BBQ.
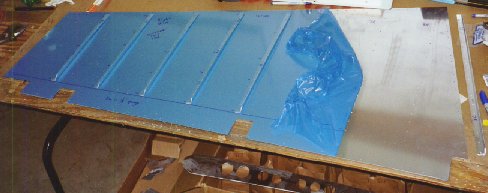
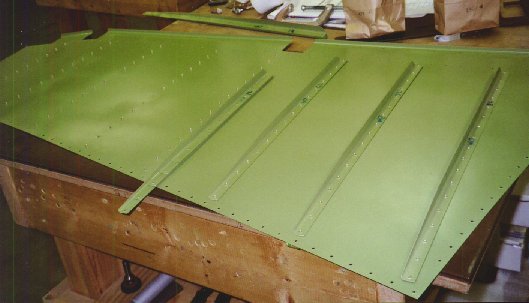
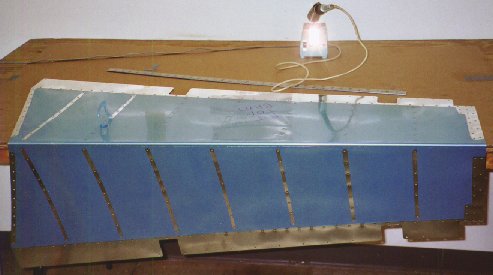
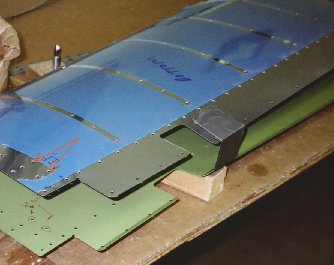
1500-1600 = debur V-stab skin. This is the new V-stab skin, ready for primer. I found that the best way to debur the skins, especially the thin elevator and rudder skins, was to drill from the outside in (when doing stiffeners). Then the burrs would be on the inside. Any burrs will be very light, anyway. Peeling off the vinyl removes some of the burrs. Then I just scrub the line of rivet holes with a Scotchbrite pad, followed by a general Scotchbrite roughing of the rest of the inside of the skin. This method is quicker than a deburring tool and just as effective, and it does not remove any excess metal or enlarge the holes.
1600-1700 = all prep work done and first batch of parts are primered. Start final-assembling H-stab
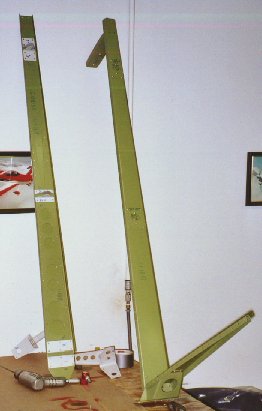
1700-1830 = The first rivets go in! Rivet forward H-stab spar, assemble rear spar

The forward H-stab spar is done!
1830-2000 = rivet rear H-stab spar together and to front spar
2000 = quit for the night - very tired
11.0 hours
Sat, Nov 16
0800-1000 = get rivet gun ready, remove vinyl from H-stab skins, put H-stab frame on jig for riveting, cleco skins to H-stab frame
1000-1500 = rivet H-stab skins. It took a long time because the skins weren't dimpled enough. I wanted to remove the skins and redimple them, but I was getting pressured to hurry up, so we countersunk the dimpled holes until the rivets sat flush. I really didn't like cutting away that much metal on the thin skins. That's why we dimple them! From this, I learned that, assuming you want your flush rivets to sit nice and flush, it’s better to err on the side of over dimpling than under dimpling. Particularly when you are using the C-frame to dimple the thicker stabilizer skins, you really need to give that C-frame a good whack with the hammer to get a good dimple. Ed was in a foul mood all morning. I had to wait around at times for squeezers and for their only swivel flush set.
1500 = Finished the Horizontal Stabilizer!
1500-1530 = lunch
1530-1600 = started assembling V-stab
1600-2000 = Had to send some V-stab parts back for paint retouch. It was done grudgingly. Abandoned V-stab for now and started assembling rudder. Also riveted the V-stab spar together.
2000-2200 = dinner at Italian
2200-2300 = file, smooth, and polish ATC's beat-up back-riveting plate so it's fit to use
2300-2330 = back rivet LT rudder skin stiffeners
2330-2400 = prep RT rudder skin for back-riveting stiffeners.
2400-0045 = back rivet RT rudder skin stiffeners
0045-0130 = cleco rudder skins onto rudder frame.
0130 = Decided to quit for the night. It's late and I need to talk to Ed about the rudder straightness instructions on page 6-7 of the manual before proceeding.
16.0 hours
Sun, Nov 17
0800-0815 = asked Ed about Van's rudder straightness instructions, and he got pretty testy about it. He said he hadn't read the instructions, Pro-Seal took too long, and the 0.100" straightness Van's called for was impossible. He said I could do it on my own that way, if I wanted to insist on it. I decided to trust him to do it, as he's done a lot more than I have.
0815-1245 = hand squeezed rudder skin rivets
1245-1330 = went back to working on H-stab for 3 things I had left out; 2 sets of rivets inside the inboard section, and bolting on the center brackets and bearing. Getting minimal help; only specific questions or tasks
1330-1345 = lunch
1345-1430 = went back to working on V-stab with parts back from paint shop. Got V-stab skin all prepped for riveting. Waiting for help with riveting. Both Jacob and Ed are working exclusively on Randy's tail, and Randy isn't even there.
1430-1600 = Worked on clearing vinyl from remaining skins while waiting to rivet. Also redimpled all V-stab skin edge holes, so I wouldn't run the risk of the problems we had with the H-stab skins.
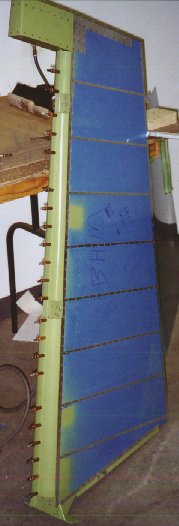
1600-1645 = Jacob helped me rivet V-stab skin onto frame. Vertical Stabilizer is done!
1645-1945 = assemble, cleco, and rivet LT and RT elevator frames
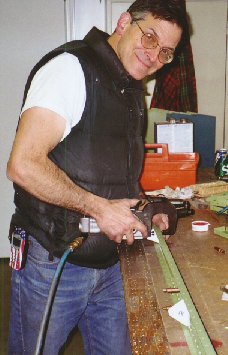
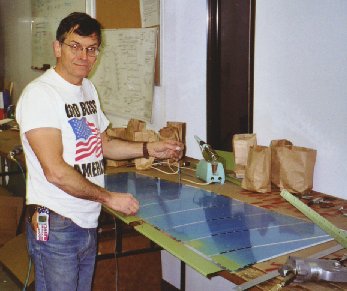
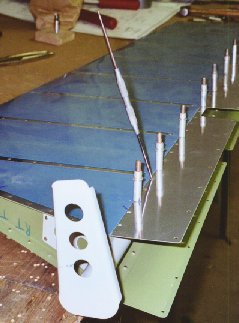
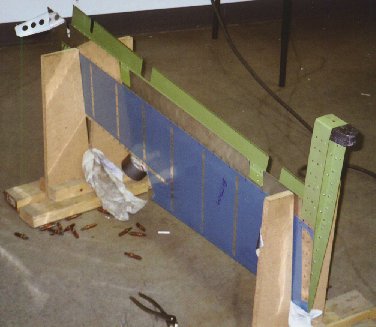
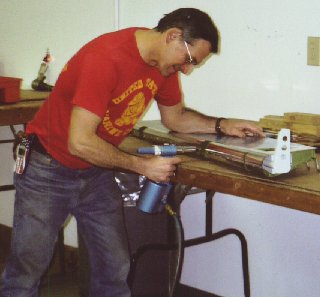
1945-2000 = De-vinyl and load RT elevator skin with rivets for back-riveting stiffeners. The soldering gun is used to cut away just enough of the vinyl to get the rivets in. This way, the vinyl stays there longer to protect the skins. You have to be very careful to let the heat do the work, and not scratch the skin metal when doing this.
2000-2030 = dinner break - leftovers from last night's Italian dinner
2030-2115 = continued loading RT elevator skin
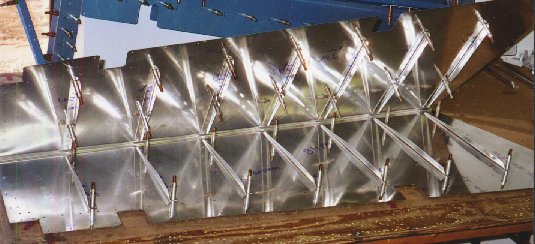
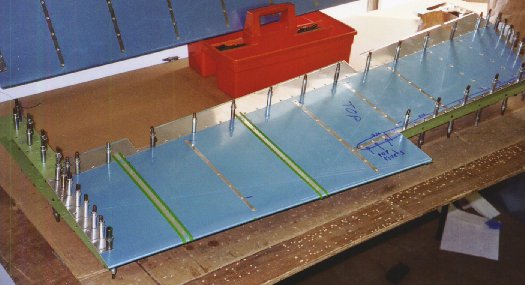
Note how duct tape is used to hold the elevator skin closed for rivet loading. This method works much better than the way I did it previously; leaving the skins open and laying the open skin over the edge of the table, on blocks.to hold it up off the table. Also note in this picture the red arrows pointing to the 2 rivets (top and bottom) on each skin that must be riveted on to the counterweight skin before doing the rest of the skin rivets.
2115-2200 = back rivet RT elevator stiffeners to skin
2200-2300 = debur RT elevator skin and cleco it to frame
2300-0130 = rivet RT elevator skin to frame. Note the use of the scribe as an alignment tool. This is another trick I picked up at ATC. If you have a flush rivet that isn't sitting square in the dimple, insert the scribe/alignment tool and give it a little tweak in the direction that the head is sitting high. It works great!
Doing the double-dimpling I described in the tools page seemed to help especially well here on those elevator ends that didn't like to line up well.

0130-0200 = load LT elevator skin with rivets for back-riveting stiffeners
0200-0230 = back-rivet LT elevator stiffeners to skin
18.25 hours
Mon, Nov 18
0900-1030 = Had to squeeze trailing edge of RT elevator. Ed was rather testy about it. He said it should have been done before riveting the skin to the frame. As I recall, the last thing he said to me before he left last night was to go ahead and complete the RT elevator. He also said that some RTV should have been put in before it was closed up, but no one mentioned it to me yesterday. I felt pretty much ignored yesterday, anyway. Working on LT elevator trim motor door backing plate and nutplates. I wanted to back-rivet them on, but Ed and Randy were using the back riveting plate as a workbench, so I squeezed them (the rivets, not Ed and Randy). I managed to get onto the backing plate long enough to back-rivet the nutplates to the backing plate and the backing plate to the skin.
1030-1100 = realized that in my haste to get on and off the back-riveting plate, I had back-riveted the nutplate holes nicely, but neglected to put 4 of the nutplates on first. Duh! So, I drilled out 8 rivets for the 4 nutplates, and squeeze-riveted them on correctly.
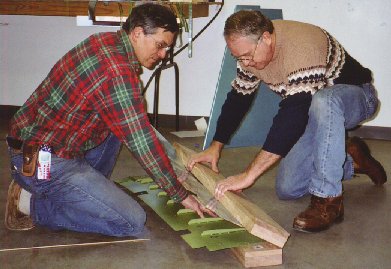
1100-1230 = Ed helped me lay out trim tab door brackets for electric trim motor. Ed also helped me with folding the ends of the trim tab and the LT elevator. I am glad Ed helped with this, as lots of people on the RV-7 list are agonizing over the process and their results. Riveted brackets onto door and bolted motor to brackets.
1230-1330 = lunch at cafeteria in town
1330-1415 = continue work on trim tab hinge layout, cleco, drill, rivet
1415-1445 = cleco LT elevator skin, except for other half of trim tab hinge
1445-1500 = Ed helped me squeeze the LT elevator trailing edge.
1500-1515 = put RTV inside elevator skin where stiffeners come together at trailing edge, and got other half of trim tab hinge laid out and marked for placement. I guess I am SOL on the RTV for the RT elevator.
1515-1715 = rivet LT elevator skin.
Jacob & Ed rolled and pop-riveted RT elevator leading edge.
1715-1815 = install elevator counterweights. Filed and fitted counterweight on one elevator so it slid firmly, but nicely, into the space. In the meantime, Jacob, in a big tear, just pounded the other one in, so now it won't come out, even with pounding on it with a hammer. I also noticed some very loose pull rivets in my RT elevator leading edge. I mentioned it to Jacob, but he just shrugged.
1815-1915 = work on elevator counterweight. I was told to countersink the holes for the attachment bolts, because dimpling was too much trouble. Then, I was given crap tools to do it with (deburring tool). There's a reason countersink cutters have a pilot. So, after working on that awhile, the hole was getting more and more out of round, as I expected it would.. I asked for a proper #10 countersink cutter. They didn't have any (?), but finally they came up with a #8 that I managed to use to get the hole somewhat rounded out. Then, I noticed that the plans said to dimple the E-713 sheet metal and countersink the E-714 lead weight, so I just left the counterweights to finish properly at home.
1915-2030 = Ed working on my rudder trailing edge. It came out looking pretty straight.
I told Ed about the loose
rivets in my RT elevator, and he helped me drill out and replace 3 of
them. There is still a bit of waviness, but the rivets are
tight. We used a different type of rivet than called for in the
plans. It seemed to work much better. The ones specified by the
plans break off too quickly and easily, and they don't pull tight enough.
The problem is
that Van’s supplies a great number of the pop rivets called for in the
plans (CS4-4 from bag #411), but only a few of the other ones.
The ones we successfully used were the MSP-42 from bag #625.
They worked much better than the CS4-4
from bag 411.
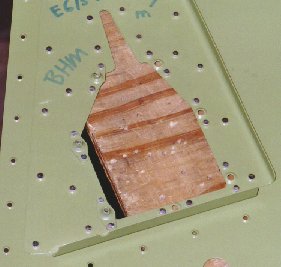
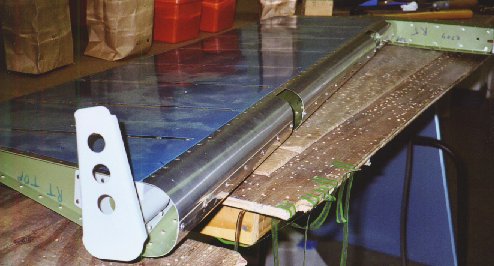
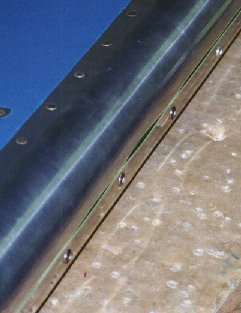 This picture is after we fixed the RT elevator L/E rivets. The silver
colored pop rivet at the top of the picture is one of the ones called for
here by Van's. The three darker gray colored ones below it are the
MSP-42 ones we replaced them with. There is still a bit of a gap left between the
worst offenders, but this is far better than it was. At least these
rivets pulled the 2 skins in tight to each other. I may put in
additional pop rivets between the existing ones, to tighten up the gap
more. Or it may be just fine the way it is.
This picture is after we fixed the RT elevator L/E rivets. The silver
colored pop rivet at the top of the picture is one of the ones called for
here by Van's. The three darker gray colored ones below it are the
MSP-42 ones we replaced them with. There is still a bit of a gap left between the
worst offenders, but this is far better than it was. At least these
rivets pulled the 2 skins in tight to each other. I may put in
additional pop rivets between the existing ones, to tighten up the gap
more. Or it may be just fine the way it is.
Ed and Jacob rolled my LT elevator leading edge.
2030-2130 = aligned trim tab with elevator and laid out exact placement of other half of hinge. Spent WAY too much time getting trim tab hinge perfectly positioned. Set one hinge rivet.
2130-2200 = Ed came back from dinner and pointed out that I had forgotten to trim the end of the hinge before rivetting it. Only one rivet had been installed, so I drilled it out to get better access for trimming the hinge. Trimmed the hinge, put it back in, and set all the rivets.
2200-2300 = After setting all the trim tab hinge rivets, the hinge rod would not even come close to going through the hinge finger holes. It was OK before riveting. Farted around with it awhile, trying to fix it and get the fingers realigned. Eventually realized it was a lost cause, and figured out that I had used too short and fat a rivet set on the shop head side, so the set had clipped the edge of each hinge finger and moved it as I squeezed each rivet. Most fortunately, I had seen a half hinge piece on the instructors' table, so I checked that out and realized it would work. I carefully drilled out all 15 rivets holding the hinge on.
2300-2345 = set up and laid out new hinge. Spent a bunch of time rounding up all the squeezers scattered around the shop, to find just the right combination of sets (narrow and long) that would squeeze the hinge rivets without touching the hinge fingers.
2345-0030 = rivet trim tab hinge. Bent lower leading edge of trim tab up a bit, so it clears lower trailing edge of elevator.
0030-0100 = pop rivet LT elevator leading edge closed.
Had same problems as Jacob did with the pop rivet stems breaking off before the 2 skin pieces were pulled fully tight, particularly in the center rivets. Will get different rivets and fix it at home.
Elevators are DONE!!
Pop-rivet rudder leading edge closed.
Their pneumatic pop rivet puller had about given up the ghost by the time I got to the last few rivets, so I did it by hand. The pop rivets specified by Van's worked fine on the rudder leading edge. Perhaps it was due to better alignment of rolled leading edge skins than on elevators?
Here go the last few rivets for the entire tail:
0100 = DONE!!!!!
0100-0300 = Clean up my work area and pack up my personal tools
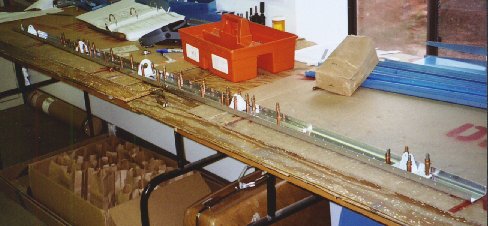
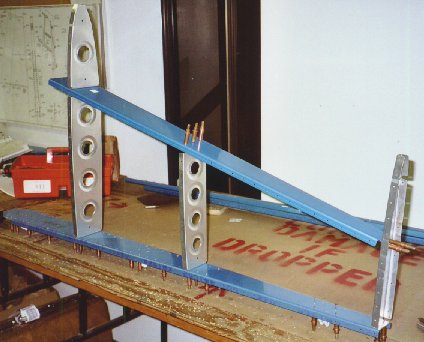
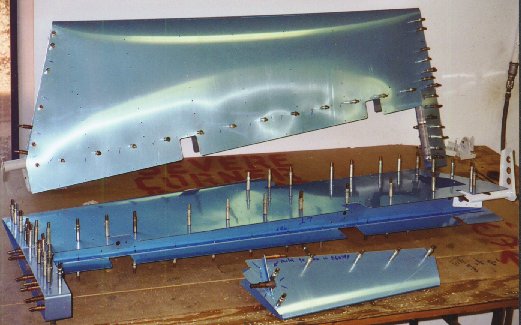
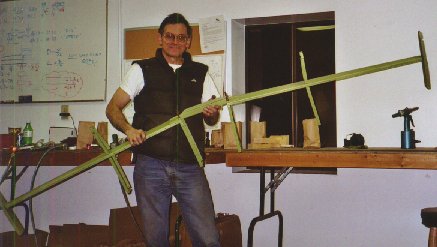
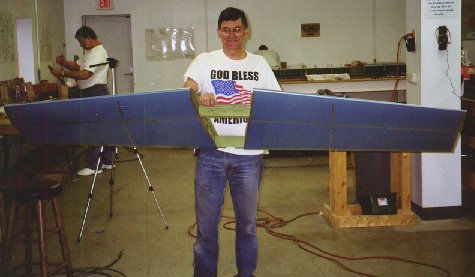
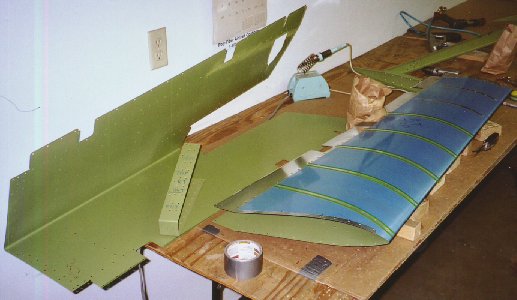
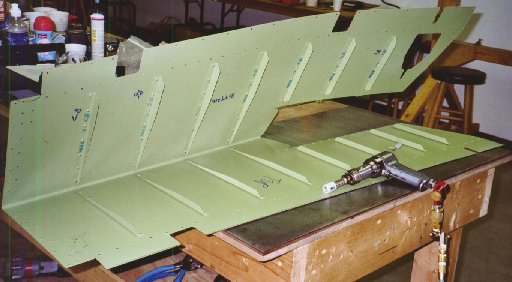
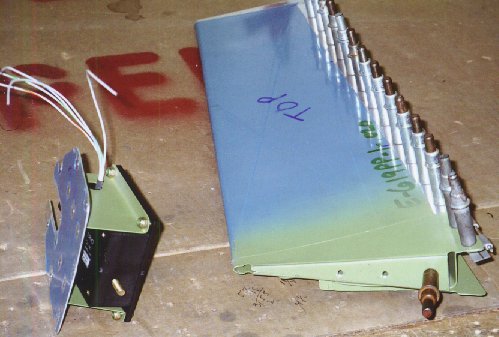
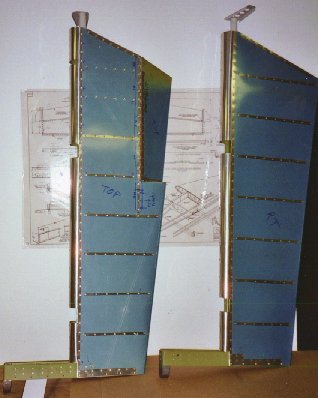
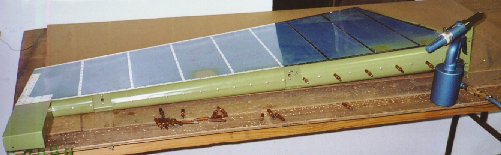
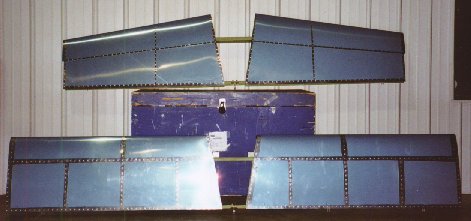
Here is an interesting shot, showing the difference between an RV-7 horizontal stabilizer on top and one for an RV-9 below it:
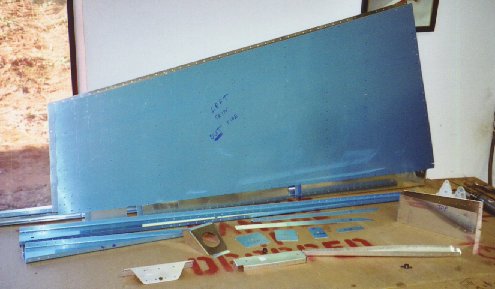
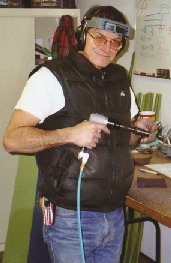
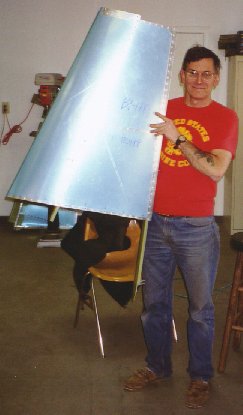
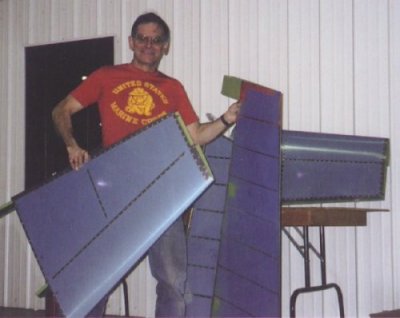
And here I am, with all my completed parts:
17.0 hours
TOTAL, including unpack, inventory, repack = 130.75
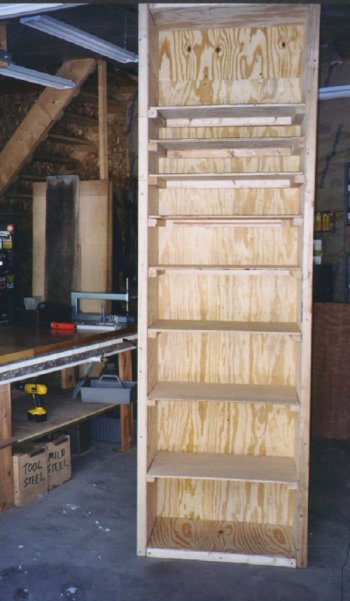
After I got my tail home, I made THIS handy cabinet from the box the finished tail came in.
Go to WINGS
BACK TO MY RV BUILDER'S HOME
BACK TO BRIAN'S HOME