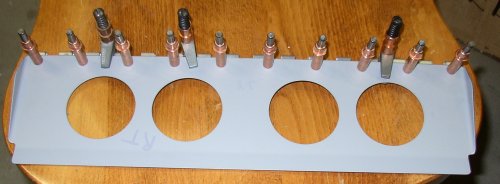
 The
0.125" seat back angles had to be milled out 0.040" at the bottom
so the hinge would sit flat under them.
The
0.125" seat back angles had to be milled out 0.040" at the bottom
so the hinge would sit flat under them.March, 2003 fuselage work
Mar 19 - Got in some more good flying today. Another lovely day. Over 4 hours cross-country in 2 CAP planes, and about 25 touch-and-goes. Spent about an hour looking at my plane, its plans, and the Orndorff videos. Decided baggage floor and seat backs are the next step.
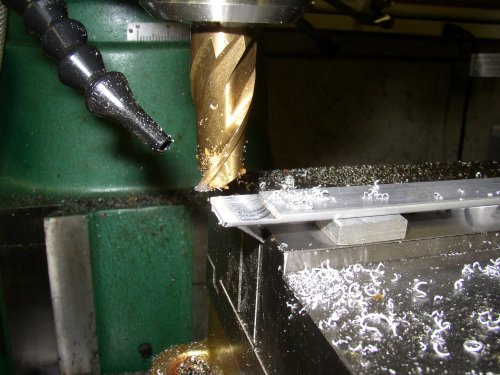
Mar 20 - I started by cleaning out more stuff from the garage to make more room for working around the fuselage. I laid out the LT seat back, and cut, trimmed, milled & deburred the aluminum angles for both seat backs. I got the LT seat back all drilled and clecoed. Then I made the seat back braces for both sides, and fabricated the F-705 J, K, and L pieces and deburred and polished them. 11.0 hr
. The
0.125" seat back angles had to be milled out 0.040" at the bottom
so the hinge would sit flat under them.
 Laying out
the LT seat back. It was rather tricky, as about 6 pieces all have to
be held together in proper alignment, then clamped, drilled, clecoed, etc.
Laying out
the LT seat back. It was rather tricky, as about 6 pieces all have to
be held together in proper alignment, then clamped, drilled, clecoed, etc.
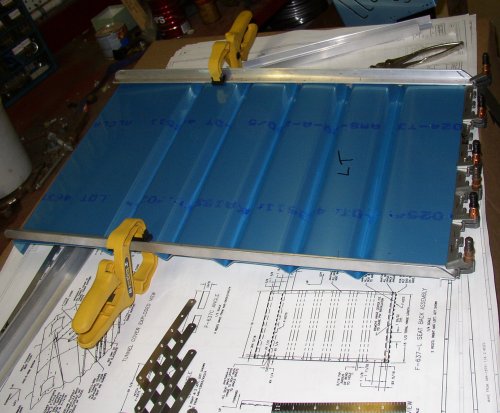
 Here is the
LT seat back all clecoed together, sitting in its place in the fuselage.
Here is the
LT seat back all clecoed together, sitting in its place in the fuselage.
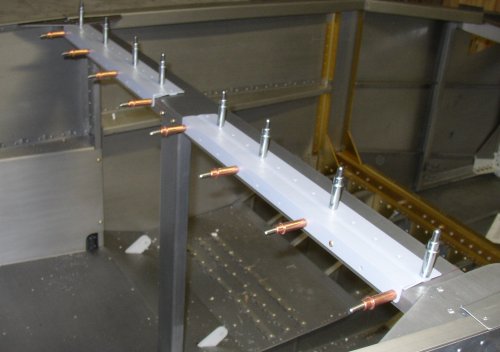
 Laying
out both seat back braces. None of the seat back parts came with any
pre-punching, so I had to do a lot of measuring, laying out, and drilling on
all these parts. I also drilled out the lightening holes, which was
vastly quicker and easier than when I tried to do something similar on the
tail at Alexander Technical Center. hindsight = As
I found out on 3/23 when I was ready to rivet these together (glad I figured
it out before riveting), those hinges were supposed to go on the BOTTOM of
the braces.
Laying
out both seat back braces. None of the seat back parts came with any
pre-punching, so I had to do a lot of measuring, laying out, and drilling on
all these parts. I also drilled out the lightening holes, which was
vastly quicker and easier than when I tried to do something similar on the
tail at Alexander Technical Center. hindsight = As
I found out on 3/23 when I was ready to rivet these together (glad I figured
it out before riveting), those hinges were supposed to go on the BOTTOM of
the braces.
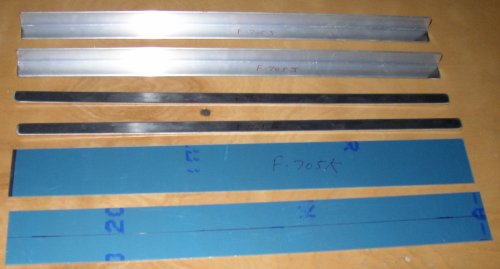 Here are the
F-705 J, K, and L pieces for both seats. These were fabricated from
bulk stock. Most all the parts I worked on today, except the actual
seat back panel, were made up from bulk stock. The bandsaw and shear
were quite helpful tools for that.
Here are the
F-705 J, K, and L pieces for both seats. These were fabricated from
bulk stock. Most all the parts I worked on today, except the actual
seat back panel, were made up from bulk stock. The bandsaw and shear
were quite helpful tools for that.
Mar 21 - Worked most of the day and evening on seat backs, seat back braces, and the no-name F-705 J, K, & L pieces. 9.5 hr
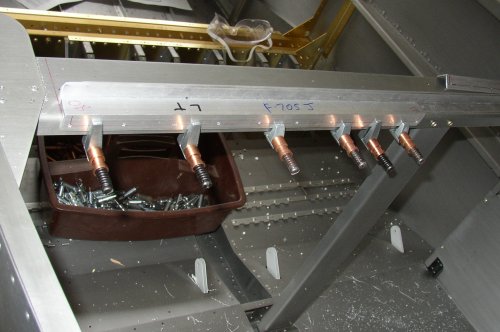
 This is one
set of F-705 K & L clecoed into position. These parts (and the -J)
hold the end of the seat back brace in place. I don't know why they
use so many parts here for such a simple function. Perhaps it will
become more apparent later.
This is one
set of F-705 K & L clecoed into position. These parts (and the -J)
hold the end of the seat back brace in place. I don't know why they
use so many parts here for such a simple function. Perhaps it will
become more apparent later.
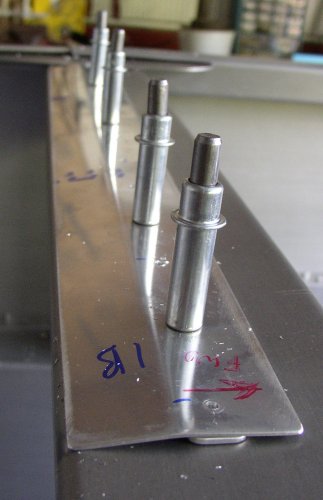
 This is the
F-705 J clamped in place, ready for initial drilling and clecoing. It
is supposed to be suspended 1/8" above the cross-brace, so I used one
of the 0.125" seat back frame legs to hold it in place while I clamped
it.
This is the
F-705 J clamped in place, ready for initial drilling and clecoing. It
is supposed to be suspended 1/8" above the cross-brace, so I used one
of the 0.125" seat back frame legs to hold it in place while I clamped
it.
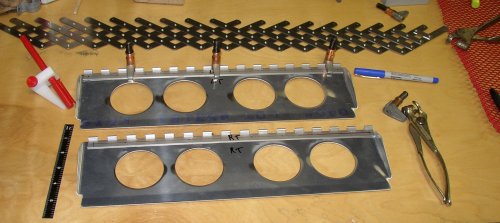
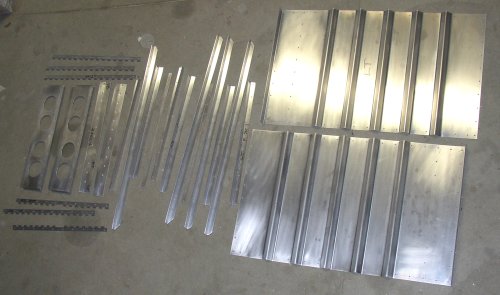 Here are all the seat back parts, ready for primer. Sure are a lot of
parts just to make a seat back and hold it in place. None of these
parts came with any pre-punching, so all the hundreds of holes were
measured, marked , and drilled in place. I'll be priming these parts
tomorrow.
Here are all the seat back parts, ready for primer. Sure are a lot of
parts just to make a seat back and hold it in place. None of these
parts came with any pre-punching, so all the hundreds of holes were
measured, marked , and drilled in place. I'll be priming these parts
tomorrow.
Mar 22 - Final metal prep, degrease, and prime all seat parts. 3.0 hr
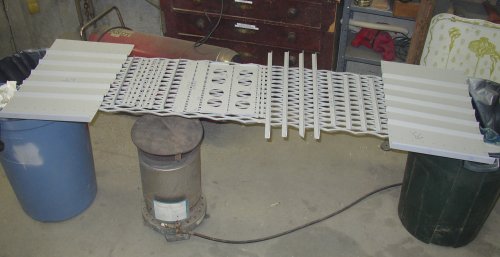 My new
priming setup. I was using an electric heat gun to warm the parts
enough to paint them, and so the paint would dry. The heater under the
new expanded steel rack lets me heat them from below and keep them warm with the same 250K BTU LP gas
heater I use to heat the garage. Yes, I do shut it and the pilot off
while I am spraying. These are all the seat parts. My kerosene
powered salamander is in the background, but I don't usually use it, because
it makes much worse fumes than the LP heater.
My new
priming setup. I was using an electric heat gun to warm the parts
enough to paint them, and so the paint would dry. The heater under the
new expanded steel rack lets me heat them from below and keep them warm with the same 250K BTU LP gas
heater I use to heat the garage. Yes, I do shut it and the pilot off
while I am spraying. These are all the seat parts. My kerosene
powered salamander is in the background, but I don't usually use it, because
it makes much worse fumes than the LP heater.
Mar 23 - Final seat assembly. First, I found out I'd laid out the seat back brace hinge upside down. So, when it was flipped over, the holes didn't line up right. I thought for quite awhile about just redrilling the holes, as it's not a critical structural component, but I ended up tossing the 2 hinges and making up new ones. I also found I had neglected to radius the vertex of the F-637 C seat back top angle, so I radiused that, too. Then I reprimed the redone pieces and touched up a couple other pieces with too-light primer. After all that, and letting the paint dry awhile, I was ready to cleco the parts together and rivet them. By 0200, I had it all done. 6.5 hr
 These
were the 2 worst misaligned holes in the seat back braces and hinges.
The rest of the holes weren't nearly so bad. I'm sure it wouldn't have
hurt anything to just drill them out to match each other, and rivet them,
but it wasn't that much harder to do it RIGHT.
These
were the 2 worst misaligned holes in the seat back braces and hinges.
The rest of the holes weren't nearly so bad. I'm sure it wouldn't have
hurt anything to just drill them out to match each other, and rivet them,
but it wasn't that much harder to do it RIGHT.
 this
is the redone seat back brace with new hinge, clamped, drilled, and clecoed.
this
is the redone seat back brace with new hinge, clamped, drilled, and clecoed.
 Here are the
F-705 J, K, and L parts clecoed and ready to rivet.
Here are the
F-705 J, K, and L parts clecoed and ready to rivet.
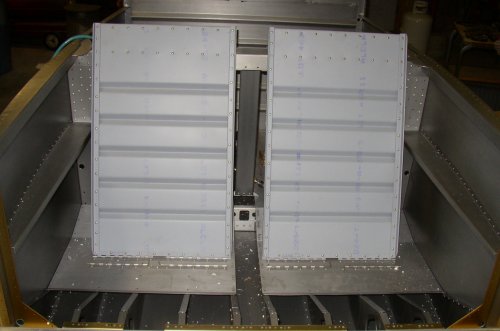 Here are
both seat backs, completely riveted together.
Here are
both seat backs, completely riveted together.
Mar 24 - A lovely clear day that reached 60 degrees. Instead of working on my plane, I went flying in CAP planes and logged another 6 hours and 25 landings, including training for my High Performance signoff.
Mar 25 - Another great flying day with CAP. A bit gusty and cross-winds, though, so only about 4 hours and 8 landings.
Mar 26-29 - working in Cambridge again
Mar 30 - back home again, getting settled in. It's SNOWING again! Got 5". Didn't get around to working on plane.
Mar 31 - Installed seat back braces & installed seats into fuselage. Riveted baggage floor in place. Spent some time thinking about customizing my baggage space so I can carry a rifle case in the plane. Worked on F741A L&R and F741B, tunnel cover. 6.5 hr
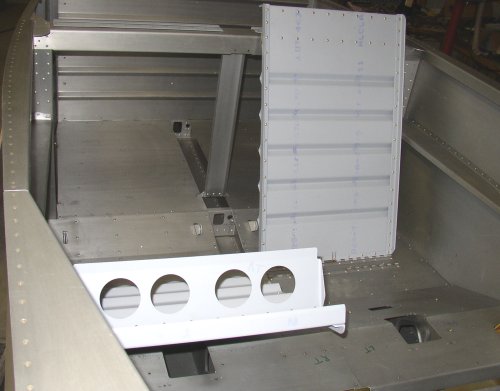 Both seats
installed with seat back braces, and baggage compartment floors (behind
seats) riveted in place.
Both seats
installed with seat back braces, and baggage compartment floors (behind
seats) riveted in place.
GO TO APRIL
BACK TO MY RV BUILDER'S HOME
BACK TO BRIAN'S HOME