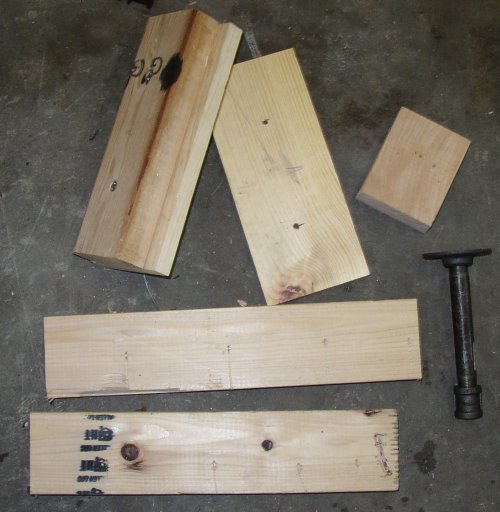
These are the parts to make
the fixture. This design will clamp the main wing spar between 2 boards,
then provide a base for mounting the pipe and flange, which then mounts into a
rack. The wing can be mounted in the rack at different heights, and it can
be rotated to any position you want. The fixture consists of 2 boards
4.75" wide by 11" long. The 4.75" is the maximum
width (for max load spreading) that will fit through the rib lightening
hole. They are clamped together, one on each side of the spar, with a bolt
run through the center of the spar lightening hole, and through the 2 boards and a
2x4 on top of the rear-most board. Then a second and third 2x4x16"
are screwed to the top of the first 2x4x11", so it extends out beyond the
wing.
Be sure to cut little
notches in the second 2x4 where it goes through the lightening hole, so it
doesn't touch the wing rib.
This is the clamping
setup being installed. Run recessed bolts though all 3 pieces, through the
center of the spar lightening holes.
Then another 16"
long 2x4 is screwed to the first one, giving you a nice square base to fasten
the pipe flange to. The coupler on the end ensures that the pipe won't
slide back out of the mounting hole on the holder stand when it is moved around.
This is the stand that the
pipe goes into. You can drill 1" holes at any convenient
height. I made holes at 28", 40", and 52", for leading edge
up, leading edge down, and wings level configurations.
This is what the stand looks
like when fully loaded. I made 2 of these. The center position is
for when only one wing is in the frame, and I can rotate it around. In
this doubled-up configuration, I can either store the wings safely and
compactly, or I can work on both of them at once in the "trailing edge
up" configuration.
This is what the root end
looks like. For now, it's just a sawhorse at 22" height. For
rotating the wing, I will need to make little adapters to keep this end the same
height as the other end.
 These are the parts to make
the fixture. This design will clamp the main wing spar between 2 boards,
then provide a base for mounting the pipe and flange, which then mounts into a
rack. The wing can be mounted in the rack at different heights, and it can
be rotated to any position you want. The fixture consists of 2 boards
4.75" wide by 11" long. The 4.75" is the maximum
width (for max load spreading) that will fit through the rib lightening
hole. They are clamped together, one on each side of the spar, with a bolt
run through the center of the spar lightening hole, and through the 2 boards and a
2x4 on top of the rear-most board. Then a second and third 2x4x16"
are screwed to the top of the first 2x4x11", so it extends out beyond the
wing.
These are the parts to make
the fixture. This design will clamp the main wing spar between 2 boards,
then provide a base for mounting the pipe and flange, which then mounts into a
rack. The wing can be mounted in the rack at different heights, and it can
be rotated to any position you want. The fixture consists of 2 boards
4.75" wide by 11" long. The 4.75" is the maximum
width (for max load spreading) that will fit through the rib lightening
hole. They are clamped together, one on each side of the spar, with a bolt
run through the center of the spar lightening hole, and through the 2 boards and a
2x4 on top of the rear-most board. Then a second and third 2x4x16"
are screwed to the top of the first 2x4x11", so it extends out beyond the
wing.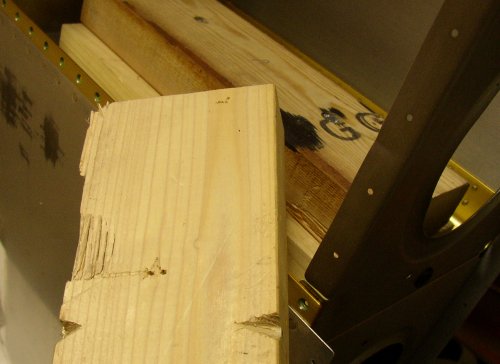 Be sure to cut little
notches in the second 2x4 where it goes through the lightening hole, so it
doesn't touch the wing rib.
Be sure to cut little
notches in the second 2x4 where it goes through the lightening hole, so it
doesn't touch the wing rib.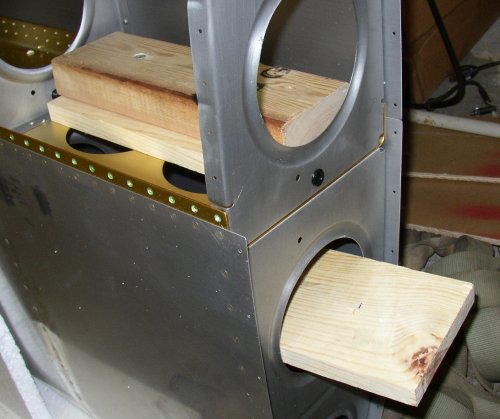 This is the clamping
setup being installed. Run recessed bolts though all 3 pieces, through the
center of the spar lightening holes.
This is the clamping
setup being installed. Run recessed bolts though all 3 pieces, through the
center of the spar lightening holes.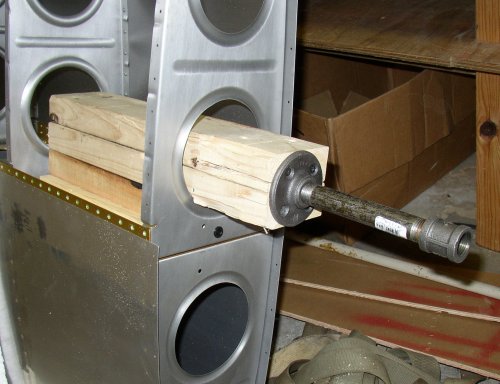 Then another 16"
long 2x4 is screwed to the first one, giving you a nice square base to fasten
the pipe flange to. The coupler on the end ensures that the pipe won't
slide back out of the mounting hole on the holder stand when it is moved around.
Then another 16"
long 2x4 is screwed to the first one, giving you a nice square base to fasten
the pipe flange to. The coupler on the end ensures that the pipe won't
slide back out of the mounting hole on the holder stand when it is moved around.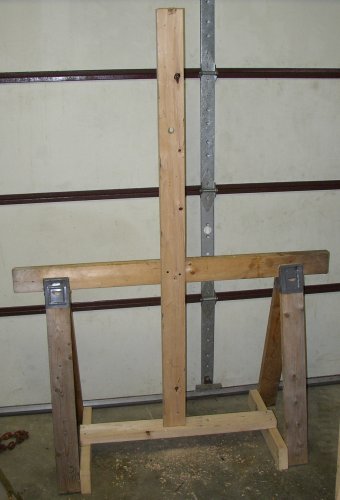 This is the stand that the
pipe goes into. You can drill 1" holes at any convenient
height. I made holes at 28", 40", and 52", for leading edge
up, leading edge down, and wings level configurations.
This is the stand that the
pipe goes into. You can drill 1" holes at any convenient
height. I made holes at 28", 40", and 52", for leading edge
up, leading edge down, and wings level configurations.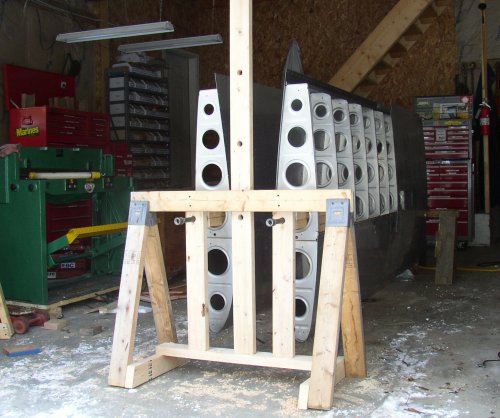 This is what the stand looks
like when fully loaded. I made 2 of these. The center position is
for when only one wing is in the frame, and I can rotate it around. In
this doubled-up configuration, I can either store the wings safely and
compactly, or I can work on both of them at once in the "trailing edge
up" configuration.
This is what the stand looks
like when fully loaded. I made 2 of these. The center position is
for when only one wing is in the frame, and I can rotate it around. In
this doubled-up configuration, I can either store the wings safely and
compactly, or I can work on both of them at once in the "trailing edge
up" configuration.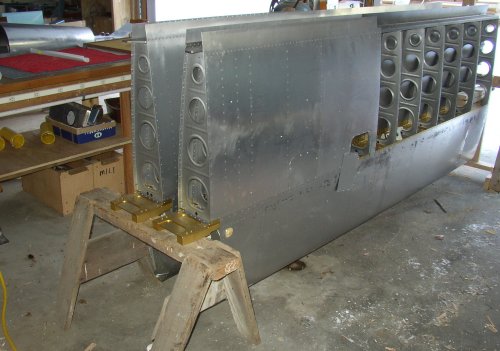 This is what the root end
looks like. For now, it's just a sawhorse at 22" height. For
rotating the wing, I will need to make little adapters to keep this end the same
height as the other end.
This is what the root end
looks like. For now, it's just a sawhorse at 22" height. For
rotating the wing, I will need to make little adapters to keep this end the same
height as the other end.