Aug 29, 2005 - I decided to cut into my
fuselage and add an access panel on each side, behind the baggage
compartment. The RT panel is for access to the custom baggage
compartment. The LT panel will be longer and will be both for batteries
access and autopilot servo access. Laid out panels on both sides. Cut out
RT panel and worked on filing and smoothing the cutout.
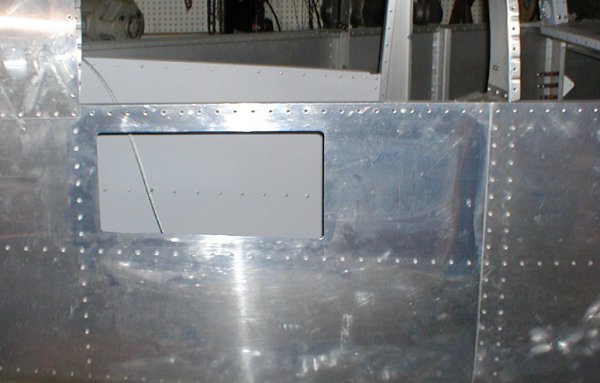
Cut out my first fuselage access panel. This is on the RT side, behind the
baggage area. The gray panel you see through the cutout is the wall I made
for the custom baggage compartment, which is behind the regular baggage
compartment, on the RT side.
Aug 31 - finish filing RT side
access panel, cut out LT access panel
Here is the LT fuselage access panel, as I begin to cut it out.
on the upper RT corner of the LT panel, I started the cut OK, going down,
then apparently was focusing on the leading edge of the cutter and ignoring
the trailing edge of it, to my peril. Grrrrrr! This really
ticked me off, but not much I can do about it. There will be a backing
plate under it. I will smooth it well, then fill in the slot with
epoxy. All my cutting has gone well, but one moment of lapsed
attention.....
This shows how I can reuse the panel I cut from the LT side as the panel for
the RT side. The panels are tapered in shape, so the longer LT one is
wider at the wide end, so I can use it as the final panel for the RT side.
I marked the approximate starting size. Now, I will have to carefully
trim it to fit the RT hole.
Sep 11 - Filed the LT side fuselage access panel cutout. I used the larger LT
side cutout as my RT side access panel, and fit the RT panel to the cutout
hole. Made RT side access panel backing plate from 0.040" 2024T3 alclad sheet. The skin there is 0.025". I debated between using
0.032" or 0.040" as the backing plate. I finally decided to go with
the heavier, but stronger, solution. You should always make your
backing plate at least one size larger than the skin thickness.
Here is the opening for the LT fuselage access panel.
Here is the RT side access panel, made from the LT side cutout, and the RT
side 0.040" backing plate. The blue line on the backing plate is where
the cover sits, and the plate overlaps both the skin and the cover by 3/4"
all around.
Here is the RT side fuselage access panel, with the backing plate drilled,
dimpled, and clecoed into place. Now, I need to do the fine-tuning of
fitting the panel to the opening.
Sep 13 - Fine-trim RT fuselage access panel cover
for good snug fit. Drill & cleco RT cover to backing plate.
Dimple cover & plate, and fit nutplates to RT backing plate.
Here is the RT access panel, after careful fitting to the opening. I
was pleased with how the fit came out.
Here, I have drilled all the cover screw holes into the backing plate,
dimpled them, and clecoed dimpled nutplates onto the back of each screw
hole. Now, I need to drill all the rivet holes to hold the
nutplates on.
Sep 14 - Dimple nutplates and drill & dimple
nutplate rivet mount holes in RT side. Prime RT backing plate.
Here is the RT backing plate, all drilled, dimpled, and primed. That's
a LOT of holes! The LT side will have even more holes. It's ready now to have the nutplates riveted in and
the plate riveted to the fuselage skin. The screw head dimpling bowed
the backing plate, but it straightens right out when clecoed into place.
Sep 15 - rivet nutplates to RT backing plate and
backing plate to fuselage skin. Update web site.
Here is the RT side fuselage access panel, all finished.
Sep 16 - Make LT side access
panel and backing plate from sheet stock. Cut center out of backing
plate. Fit backing plate to skin. Dimple backing plate and
fuselage skin. Fit cover to hole. Lay out cover screw holes.
Match drill and dimple cover and backing plate.
Here are the 0.025" access cover and the 0.040" backing plate for the LT
side, cut out from sheet stock with the shear.
Here is the LT backing plate, clecoed in place.
I removed the backing plate and put a light coat of dark primer on it.
This makes it MUCH easier to see exactly where the seam is when trying to
fine-tune the fit of the cover to the hole.
Sep 17 - Lay out nutplates for LT
cover screws. Drill & cleco nutplate rivet holes. Dimple
nutplate rivet holes. Prime backing plate to 0330. Slept
to noon, then clecoed the backing plate in place and dimpled the nutplates.
Clecoed the nutplates in and riveted them. Riveted the backing plate
to the skin.
Here is the drilled, dimpled, and primed LT backing plate.
 Cut out my first fuselage access panel. This is on the RT side, behind the
baggage area. The gray panel you see through the cutout is the wall I made
for the custom baggage compartment, which is behind the regular baggage
compartment, on the RT side.
Cut out my first fuselage access panel. This is on the RT side, behind the
baggage area. The gray panel you see through the cutout is the wall I made
for the custom baggage compartment, which is behind the regular baggage
compartment, on the RT side.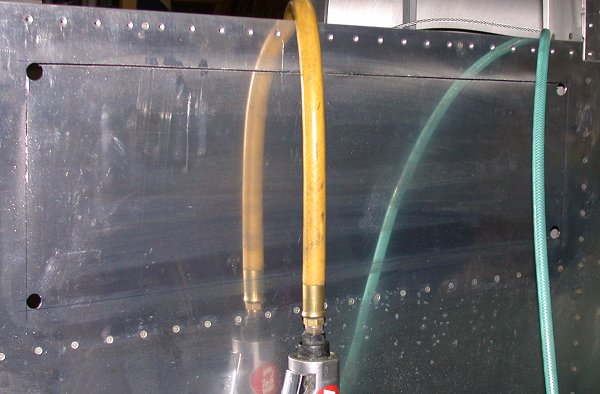 Here is the LT fuselage access panel, as I begin to cut it out.
 on the upper RT corner of the LT panel, I started the cut OK, going down,
then apparently was focusing on the leading edge of the cutter and ignoring
the trailing edge of it, to my peril. Grrrrrr! This really
ticked me off, but not much I can do about it. There will be a backing
plate under it. I will smooth it well, then fill in the slot with
epoxy. All my cutting has gone well, but one moment of lapsed
attention.....
on the upper RT corner of the LT panel, I started the cut OK, going down,
then apparently was focusing on the leading edge of the cutter and ignoring
the trailing edge of it, to my peril. Grrrrrr! This really
ticked me off, but not much I can do about it. There will be a backing
plate under it. I will smooth it well, then fill in the slot with
epoxy. All my cutting has gone well, but one moment of lapsed
attention.....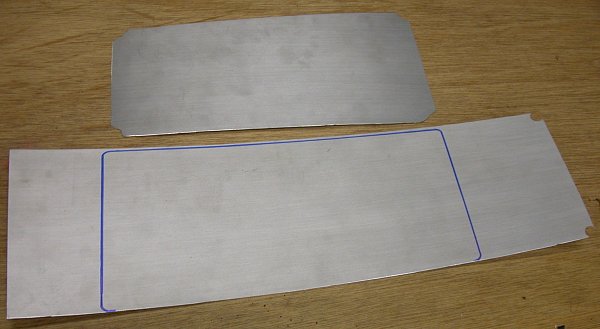 This shows how I can reuse the panel I cut from the LT side as the panel for
the RT side. The panels are tapered in shape, so the longer LT one is
wider at the wide end, so I can use it as the final panel for the RT side.
I marked the approximate starting size. Now, I will have to carefully
trim it to fit the RT hole.
This shows how I can reuse the panel I cut from the LT side as the panel for
the RT side. The panels are tapered in shape, so the longer LT one is
wider at the wide end, so I can use it as the final panel for the RT side.
I marked the approximate starting size. Now, I will have to carefully
trim it to fit the RT hole.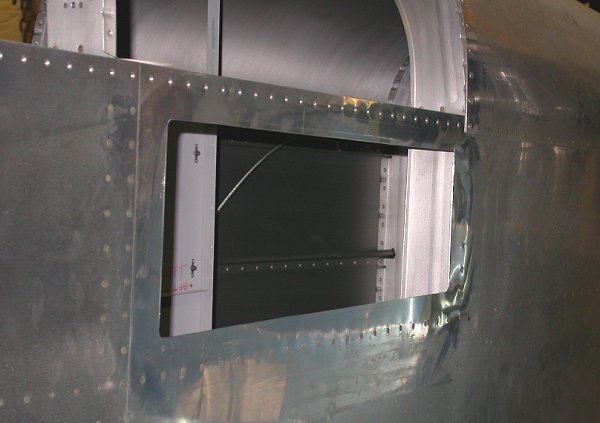 Here is the opening for the LT fuselage access panel.
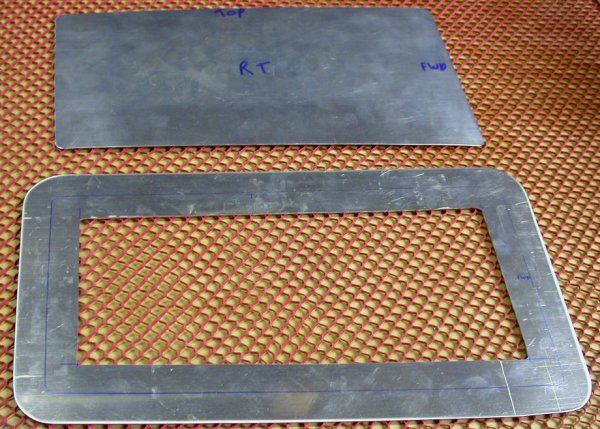 Here is the RT side access panel, made from the LT side cutout, and the RT
side 0.040" backing plate. The blue line on the backing plate is where
the cover sits, and the plate overlaps both the skin and the cover by 3/4"
all around.
Here is the RT side access panel, made from the LT side cutout, and the RT
side 0.040" backing plate. The blue line on the backing plate is where
the cover sits, and the plate overlaps both the skin and the cover by 3/4"
all around.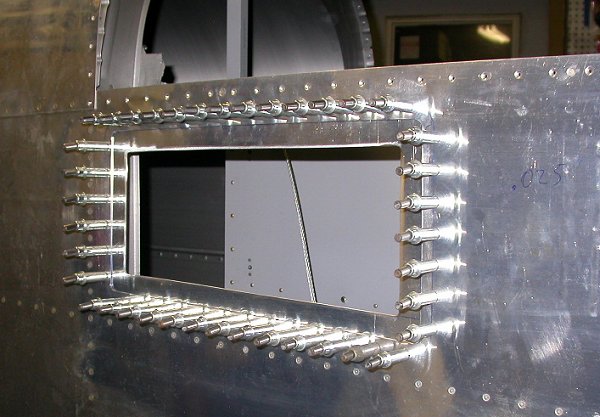 Here is the RT side fuselage access panel, with the backing plate drilled,
dimpled, and clecoed into place. Now, I need to do the fine-tuning of
fitting the panel to the opening.
Here is the RT side fuselage access panel, with the backing plate drilled,
dimpled, and clecoed into place. Now, I need to do the fine-tuning of
fitting the panel to the opening.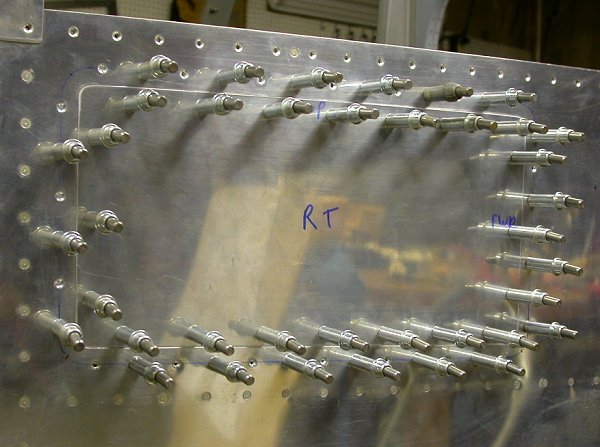 Here is the RT access panel, after careful fitting to the opening. I
was pleased with how the fit came out.
Here is the RT access panel, after careful fitting to the opening. I
was pleased with how the fit came out.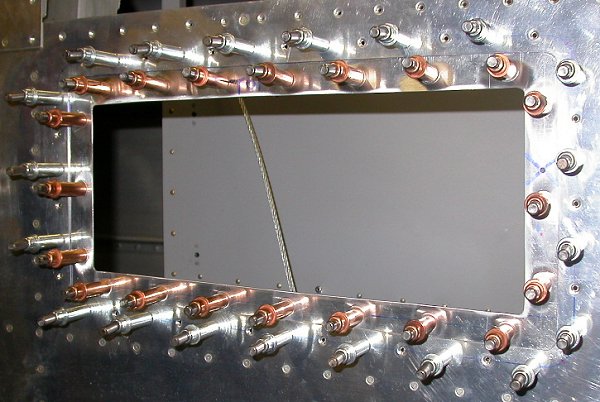 Here, I have drilled all the cover screw holes into the backing plate,
dimpled them, and clecoed dimpled nutplates onto the back of each screw
hole. Now, I need to drill all the rivet holes to hold the
nutplates on.
Here, I have drilled all the cover screw holes into the backing plate,
dimpled them, and clecoed dimpled nutplates onto the back of each screw
hole. Now, I need to drill all the rivet holes to hold the
nutplates on.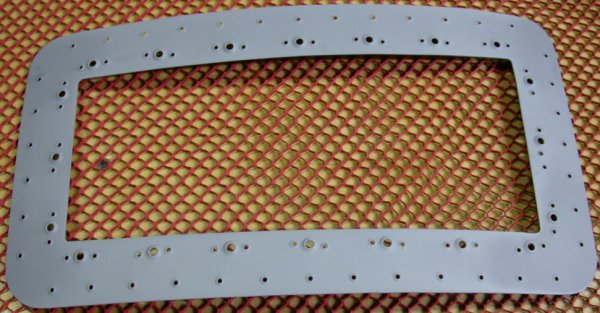 Here is the RT backing plate, all drilled, dimpled, and primed. That's
a LOT of holes! The LT side will have even more holes. It's ready now to have the nutplates riveted in and
the plate riveted to the fuselage skin. The screw head dimpling bowed
the backing plate, but it straightens right out when clecoed into place.
Here is the RT backing plate, all drilled, dimpled, and primed. That's
a LOT of holes! The LT side will have even more holes. It's ready now to have the nutplates riveted in and
the plate riveted to the fuselage skin. The screw head dimpling bowed
the backing plate, but it straightens right out when clecoed into place.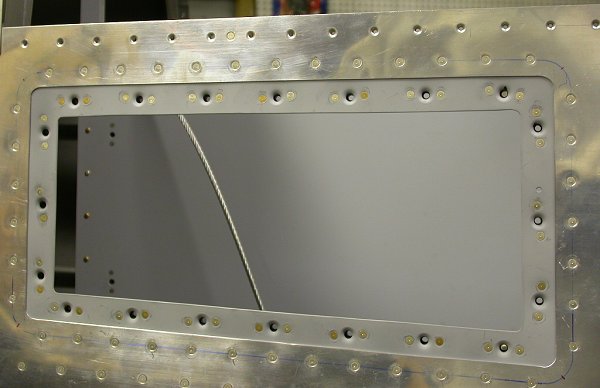 Here is the RT side fuselage access panel, all finished.
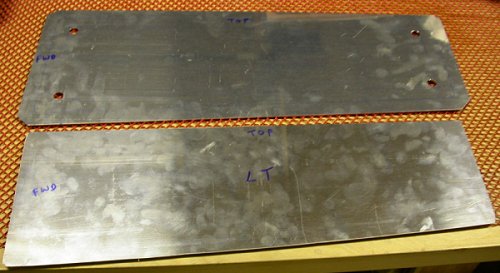 Here are the 0.025" access cover and the 0.040" backing plate for the LT
side, cut out from sheet stock with the shear.
Here are the 0.025" access cover and the 0.040" backing plate for the LT
side, cut out from sheet stock with the shear.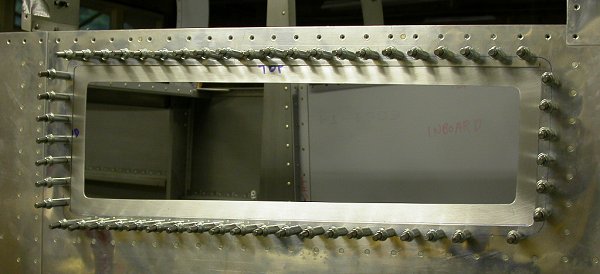 Here is the LT backing plate, clecoed in place.
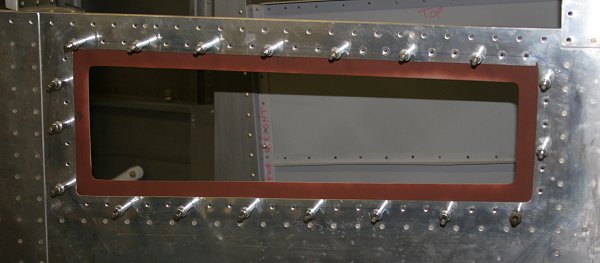 I removed the backing plate and put a light coat of dark primer on it.
This makes it MUCH easier to see exactly where the seam is when trying to
fine-tune the fit of the cover to the hole.
I removed the backing plate and put a light coat of dark primer on it.
This makes it MUCH easier to see exactly where the seam is when trying to
fine-tune the fit of the cover to the hole. 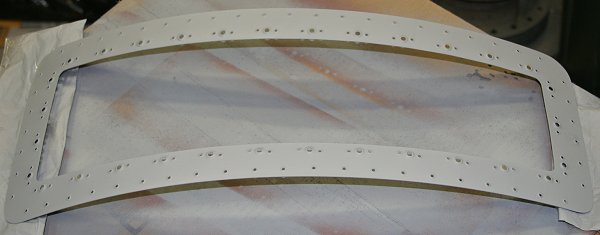 Here is the drilled, dimpled, and primed LT backing plate.
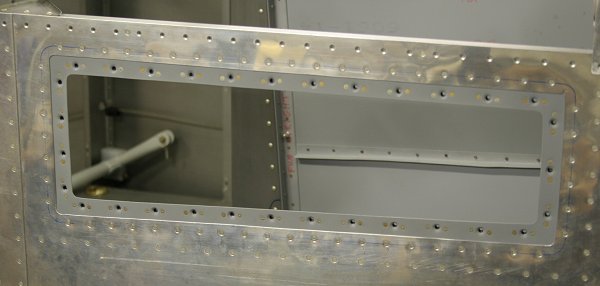 The LT fuselage access panel is complete.