May 2 - Got home for a weekend. Planning &
layout for optional baggage tiedowns. Found it hard to get started
actually DOING something. 2.0 hr
May 4 - Installed baggage tiedowns. Installed
baggage compartment side and rear rivets and nutplates. 2.5
hr
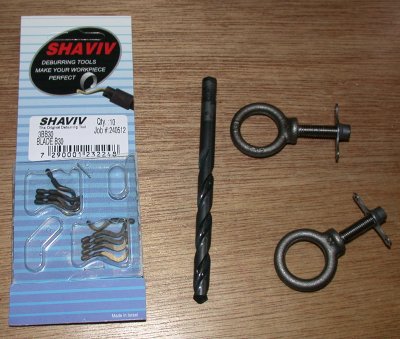
Got in an order
from MSC; my 1/4"-28 baggage tiedown eyebolts, a 0.311" drill bit
for the landing gear legs, and some "both sides of a hole at once"
cutters for my deburring tool. The cutters are especially useful for
trimming the back side of a hole, where I don't have access.
Cargo
tiedown eyebolts installed.
May 19 - finished riveting nutplates for rear baggage
panel 1.5 hr
May 25 - install nutplates (decided to use nutplates
instead of nuts called out in plans) for brake reservoir mounting to
firewall. 0.5 hr
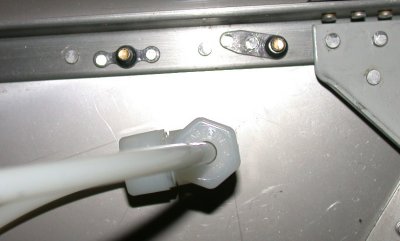
This
shows the nylon tubing going to the brake reservoir, and the 2 nutplates
riveted in place to hold the reservoir on.
May 26 - Finish mounting brake reservoir to fwd side
of firewall. Connect brake cylinder feed lines to reservoir.
Install LT & RT brake pressure lines. 5.0
hr
Brake
reservoir mounted to fwd side of firewall.
The brake pressure lines proved to be much easier to install
than I thought they would be. It looked like it was going to be a real
bear to feed the lines through with complex bends, but the soft aluminum
tubing made it easy. First, I used a cloth measuring tape to follow
the curves (Karla helped with this) and measure how long each one should
be. I added a couple inches, to be safe, and cut the 2 lengths I
needed. Then, I just started in the middle, at the wing spar, and fed
it out through the grommets to the bulkhead fitting at the landing gear
mounts. Then I molded the curves out from the spar forward to the
firewall and over to the fittings on the brake bracket mounted to the rear
of the firewall. I made all the bends with my fingers, being careful
not to kink the tubing. I have a tubing bender, but all the bends I
needed were in areas too tight to fit in the bender. Using the flaring
tool (from Avery) was a bit cumbersome in the tight spaces near each end of
the tubing, but it's a great tool, and the flares all came out good. I
had to flare the ends after laying out the lines, because the flares won't
go through the grommets, and because you don't know exact length needed
until after it's all laid out. DON'T FORGET TO PUT THE FITTINGS ON THE
TUBING BEFORE FLARING. Don't ask why I know this.
UPDATE - BE SURE TO READ MY JUNE 12
NOTE ABOUT PUTTING IN YOUR FUEL LINES BEFORE THE BRAKE LINES.
Brake
fluid supply lines going from brake reservoir to the master cylinders
 Got in an order
from MSC; my 1/4"-28 baggage tiedown eyebolts, a 0.311" drill bit
for the landing gear legs, and some "both sides of a hole at once"
cutters for my deburring tool. The cutters are especially useful for
trimming the back side of a hole, where I don't have access.
Got in an order
from MSC; my 1/4"-28 baggage tiedown eyebolts, a 0.311" drill bit
for the landing gear legs, and some "both sides of a hole at once"
cutters for my deburring tool. The cutters are especially useful for
trimming the back side of a hole, where I don't have access. Cargo
tiedown eyebolts installed.
Cargo
tiedown eyebolts installed.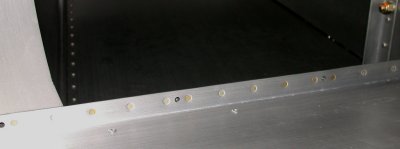
 This
shows the nylon tubing going to the brake reservoir, and the 2 nutplates
riveted in place to hold the reservoir on.
This
shows the nylon tubing going to the brake reservoir, and the 2 nutplates
riveted in place to hold the reservoir on. 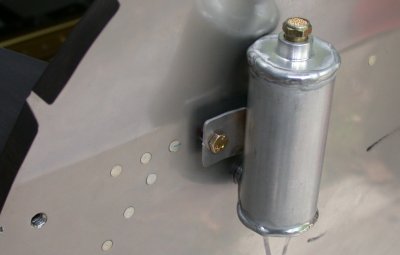 Brake
reservoir mounted to fwd side of firewall.
Brake
reservoir mounted to fwd side of firewall.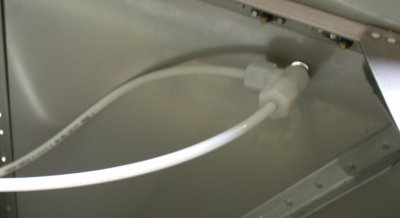 Brake
fluid supply lines going from brake reservoir to the master cylinders
Brake
fluid supply lines going from brake reservoir to the master cylinders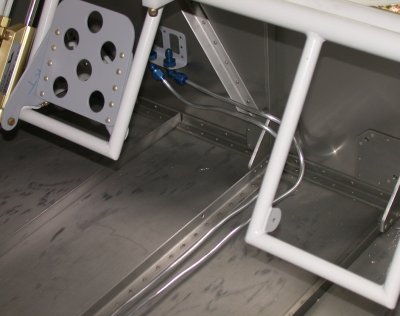 Forward brake
lines installed
Forward brake
lines installed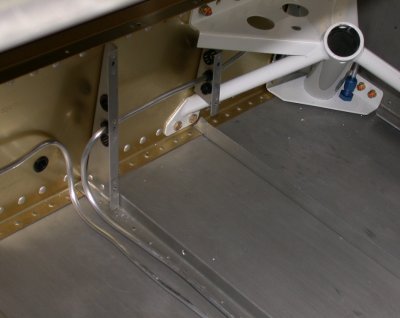 Aft brake
lines installed
Aft brake
lines installed